<"Protolanced">
1> a free-lanced or made up model
railroad based on the operations of a prototype or real railroad.


My layout is based in the spring of 1937, in NW Montana,
it is a representation of a fictional town named Wolf Prairie (Wolf Prairie,
although not a town, is an area up the Fisher River Road, in the Flathead
Tunnel area of the BNSF) The area my layout is based on is off of the Big
Blackfoot Branch of the Milwaukee Road, the Big Blackfoot is a branch line that leaves the Milwaukee main in
Bonner Mt, and travels up the canyon approximately 30 miles or so. It was used
by the Milwaukee to bring logs down to the mill in Bonner. My little road
branches off the Blackfoot, and goes up into the mountains where gold and
silver has been located. There is a small town, a mine and a small sawmill to
support both.
The material is mined and stamped, brought down to town by geared steam, weighed, then the cars are set out for pickup by the
Milwaukee Road, for transport down to the Anaconda smelter by an Alco 2-6-0 rod engine.
Currently the motive power is:
(1) ea. 3-truck Shay (Bachmann)
(1) ea. 2-truck Shay (Modified Bachmann)
(1) ea. 3-truck Climax (Bachmann)
(1) ea. 2 truck
Heisler (Rivarossi)
(1) ea. Class A Climax (MDC modified)
(1) ea. Diesel electric Boxcab (MDC modified)
(1) ea. 2-6-0 Mogul (Bachmann)

A map of the area, Bonner MT, with it's large sawmill, is just off of present
day I-90. The Milwaukee Road Mainline is south, on the other side of the Clark
Fork River. A branch left the main, and went up the Blackfoot River Canyon
(shown in red) The Wolf Prairie,
at Clearwater MT, left the Blackfoot branch and proceeded up Blanchard Creek,
the site of the gold strike.

A view of the Bonner area, the MILW mainline is at the bottom of the photo, the Big Blackfoot Canyon is at the top of the picture. The Northern Pacific is seen on the other side of the river.

The bridge over the Big Blackfoot River at Bonner. This bridge is in the Timberjack movie seen here.


Pictures of the 3 truck Willamette and the branch line.


The present area.
The original bridge and piers above.

Today all that is left is the trestle piers across the river just
outside the the mill site.


Edit-The state removed the piers in 2011, seems they were concerned about rafters hitting them?

Up the river a few miles remains a wood trestle (photo courtesy of montanatom50 on Flickr). Trestle is opposite of the hwy.

The old roadbed and rock slide along the Big Blackfoot River.

The same area, taken from a recreational area off the highway.

The old roadbed along the Big Blackfoot River.

Another rock slide picture.

The old roadbed along the Big Blackfoot River.

The old Milwaukee Road Mainline and the switch to the Big
Blackfoot Branch.

The Willamette that appeared in the movie Timberjack
and worked the Big Blackfoot branch now resides at
Fort Missoula.

The Wolf Prairie Yard and Station.
The new mountain as built several months ago, cardboard strips and scenery cloth. The big white blob in the corner.


We later painted the white blob for 2 reasons, 1) tone it down 2) You don't want bright white showing thru your ground cover.

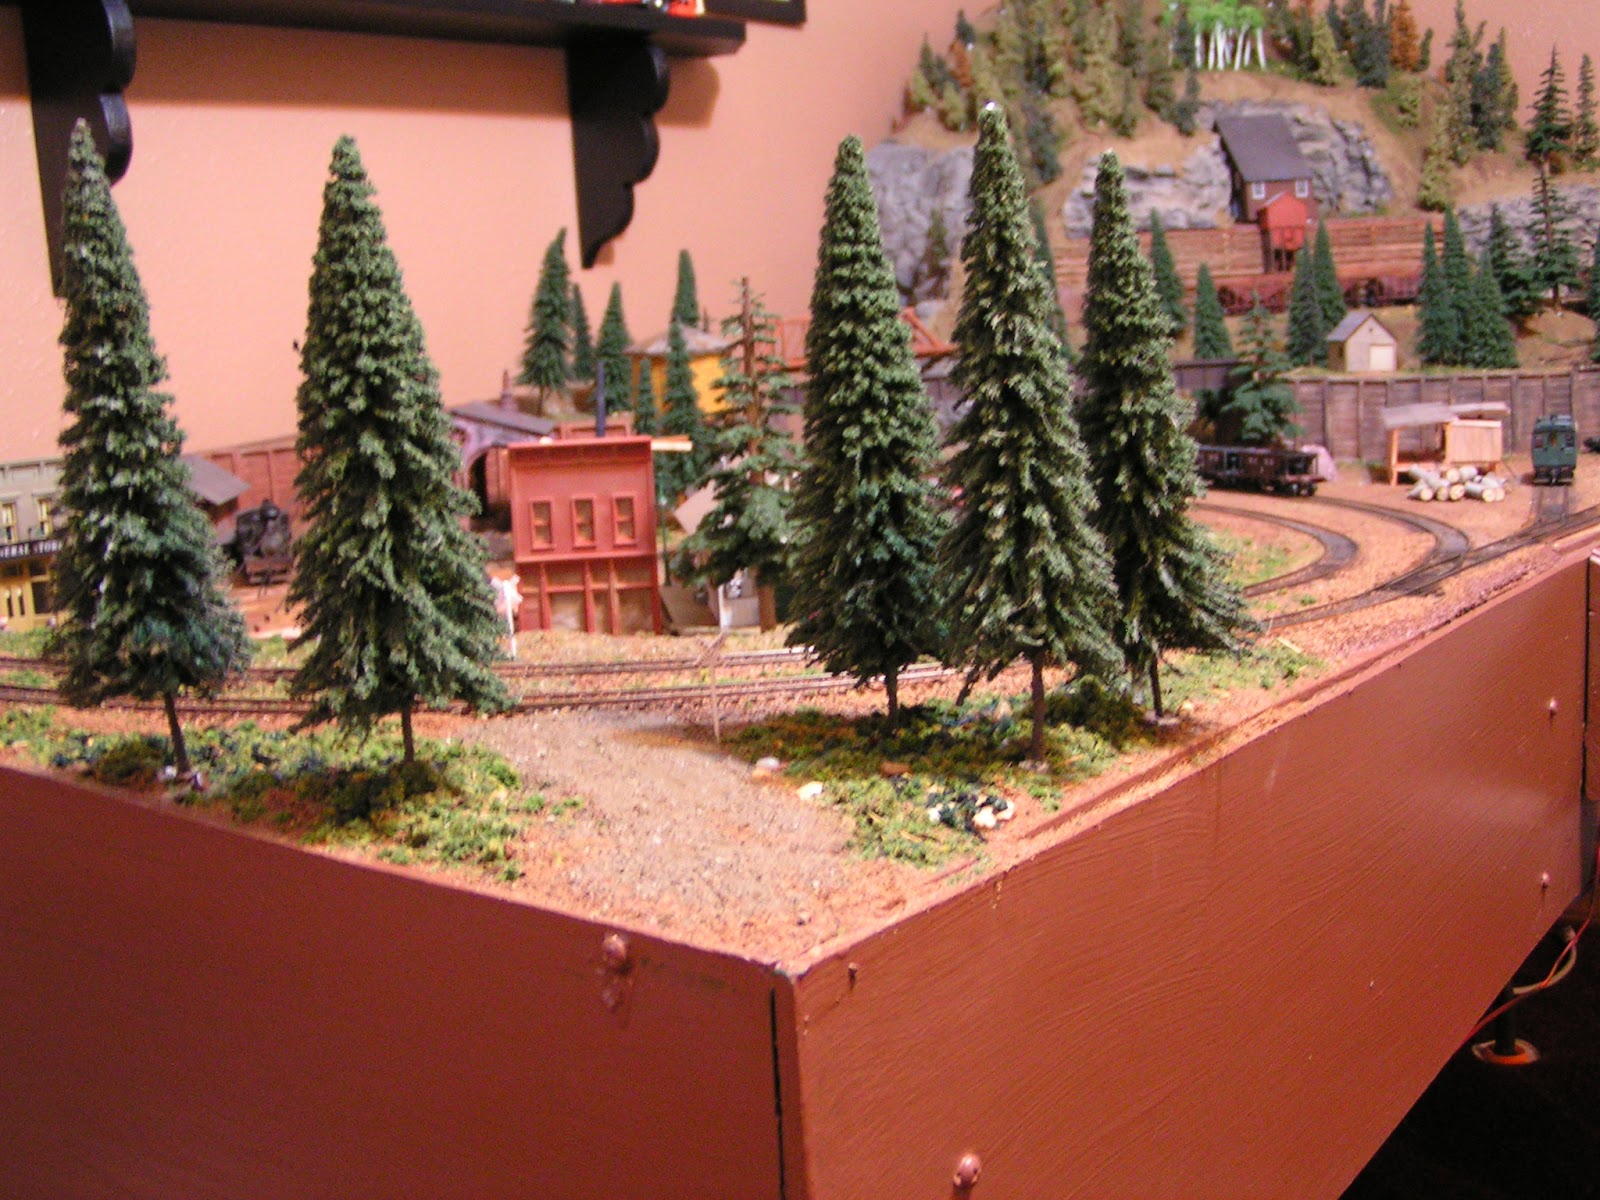
This weekend, with the help of my very patient wife, we attacked the mountain, or in other words, got some trees on it! I had around 100 trees from Timberline that have been in storage for awhile, the track from the yard bridge to the tunnel and the mine bridge to Aspen hill needed to be ballasted, time to get this stuff done!
As I mention before in another post, I scratch built the cribbing. The first step was to stain the the basswood. While waiting for that to dry, I obtained a for sale sign from Home Depot, for those of you that do not know, they are made of sheet styrene, and this is a much better value. The next step was to construct the cribbing, I did this by gluing the basswood to the sheet styrene. Once all was dry, I poured Smith & Sons course rock/dirt ground cover between the cribbing, wet watered it (I prefer alcohol) and then white glue/ water mixture, the same method you would use for ballasting. Once this was dry, I then glued them to the mountain.

We spent about 5 hours planting trees and putting in ballast. I am satisfied with the outcome so far, the next step for this area is to add small bushes and woodfall, and the I will weather and detail the mine, and paint the tipple. Suggestions are welcome!!
The abandoned narrow gauge ROW that used to serve the mine.


I finally finished the 2 retaining walls, I fiddled with the MDC Shay Friday night until it got the best of me, I had it running okay, but then one of the drive lines came off, I bumped it, it fell into oblivion. I spent the next hour looking for it, and gave up. So I wanted to do something else and figured it was time to finish the cribbing for the mine. It is bass wood that I cut, stained, and assembled. I glued the wood to sheet styrene (actually a "For Sale" sign from Home Depot, it is a source for low cost styrene)and let dry, then I filled the gaps with Smith & Sons course natural soil. Great stuff, I have and will use it all over the Wolf Prairie Scenic Express has it here.
The mine and tipple need to be installed, sceniced and weathered.


Next I will start making the 2 short trestles.

I assembled, painted and installed the mine trestles, the trestle bents came from a Walthers Cornerstone Kit. It was a large trestle bridge, I used six of the bents out of this kit for these trestles. Also the trestle decking is a product from Grand Central Gems, the have nice stuff, I really like the trees they have, but that's for another day.

I also painted the ties and ballasted the track at the mine, and the area below the trestles. DOH! I forgot to paint the rails! I will have to do that very carefully now that the track is ballasted.


Monday night I got out the hot glue gun (ouch) and installed my Cripplebush Rubber Rocks. These things are awesome, I purchased these rubber rocks last summer and they have been sitting around since. I used the "Santa Fe Canyon" and 2 of the "Shale 1" rocks. I didn't buy from Cripplebush but rather I purchased these at Kanawha Creek Rail Supply. They were a little cheaper plus I purchased from trees as well. I'm not sure I like the trees, they are Timberline brand and they look funky compared to my Bachmann trees and my new favs, Grand Central Gems Lodgepoles.
Okay, I haven't done squat as far as construction for a while. Pretty much all I have been doing is running trains, and debugging turnouts, couplers and cars. Time for me to build something, so the next thing I'm going to tackle is a Howe Truss bridge for the mine branch. The Grand Central Gem Deck has been installed for a long time, what I plan on doing is attaching the Midwest Products Silver Creek Timber Kit .

Grand Central Gems deck upper left corner and the mine branch.

From Black Bear Construction Co. Inc.
"Choosing a Timber Bridge
The trestle bridge was always the preferred bridge because it is the cheapest and easiest to build.
The Howe Truss Bridge revolutionized timber bridge construction. It's structural integrity makes efficient use of wood's ability to withstand compressive stress. It is characterized by heavy members that lean inward. These inward leaning members and top chord carry compression. The vertical members (typically iron rods) and bottom chord carry tension. The outward leaning members aren't actually needed in static situations. However, the dynamic loading applied by a moving train makes them necessary. Just about every timber bridge built after the Civil War is a Howe Truss Bridge."
More construction pictures to come.....
I have the lumber separated and stained. A jig is needed to assemble the side panel assembly. The jig is cut out from the back of the cardboard box and assembled, this is not a bridge you can make quickly apparently.
1) Assemble the jig
2) Glue
3) Let dry.
Assembling the Side Panels
Now with the jig assembled I have finally started step 1, which is installed the jig into the "C" channel (bottom chord) glue and install 5 vertical posts, put a "C" channel on the top, then rubber band them together to hold fast while the glue dries.

Here we are with the piece removed from the jig after the glue dried, and the second side is already in the jig.


Next I installed the angled beams and top Channel to both sides.

Another Angle...

Notice the bottom C Channel is facing up.

Next to do was to take the 4 angled end pieces and glue 4 beams into the channel, making sure a small portion extends out into the 45 degree cut.

This fits into the bottom C Channel, keeping the 45 degree timber centered on the channel while it dries.
The upper 45 degree cut fits into the vertical beam at the top. Nicely designed and easy kit to do.


The next step is to cut leftover beams to length to fill in the bottom C Channel with these pieces, essentially to hide the fact that the lower beam was a C Channel.

That's it for now, time to put these up and let the glue dry.


Just a test fit at the location to see how it looks. I like it.
 |
| This kit is produced by Northeastern Scale Models. |

This little kit can be built in an evening, (after you have painted or stained the wood and let it dry) I chose to stain it with an India ink and alcohol wash. It took several washes to get it the color I wanted, because this is a wood kit, always wash or paint both sides of the wood to help prevent warping, even then I place an flat heavy object on the pieces while they dry.

The first step was to glue 2 boards on each end of the 2 side walls.


Next step was to cut out the window panes and molding.

Glue the window pane onto the square molding.

Glue the assembled windows into each side wall and the rear wall.

Glue a small molding onto the front wall, glue the wall to the base.


Install the sliding door onto the front wall.

Install the side walls...

and the rear wall respectively.


Add the moldings around the front sliding door, then glue the two roof pieces.


The almost finished motor car shed plopped down in several different spots on my layout. I say almost because the kit came with NO roofing material (??) I plan on wood shingles, probably the printed paper type.


**UPDATE**
I have added the roof details, metal rusted roof from Paper Creek Model Works. After taking the pictures I did notice the edge of the roof line needed to be trimmed up. Another example of using photos to pick up flaws in your modeling. I have since trimmed the edges closer and lightly colored the trim.
I have added the roof details, metal rusted roof from Paper Creek Model Works. After taking the pictures I did notice the edge of the roof line needed to be trimmed up. Another example of using photos to pick up flaws in your modeling. I have since trimmed the edges closer and lightly colored the trim.
I will weather it with Bragdon powders, run some rail from the door to the tracks, and add soil around the base. This is a very simple and inexpensive kit for a beginners wanted to try some techniques on structure buildings, at a low cost.
Updated
Finish scene with wood rails and ground cover.


I didn't blog on it at all but in one corner of the layout that was unsceniced for so long was completed several months ago.

I added a road, crossing and cross bucks.

And then one of those insanely expensive Woodland Scenics logging trucks. My wife purchased it for my birthday. It looks great but man, its $25.00, and open the package and plop on the layout, somehow I feel guilty cause I didn't build it. Oh well, maybe the MRR Police will cut me some slack.
Anyway, what I would like to show you is how I made my "backwoods" railroad crossings.

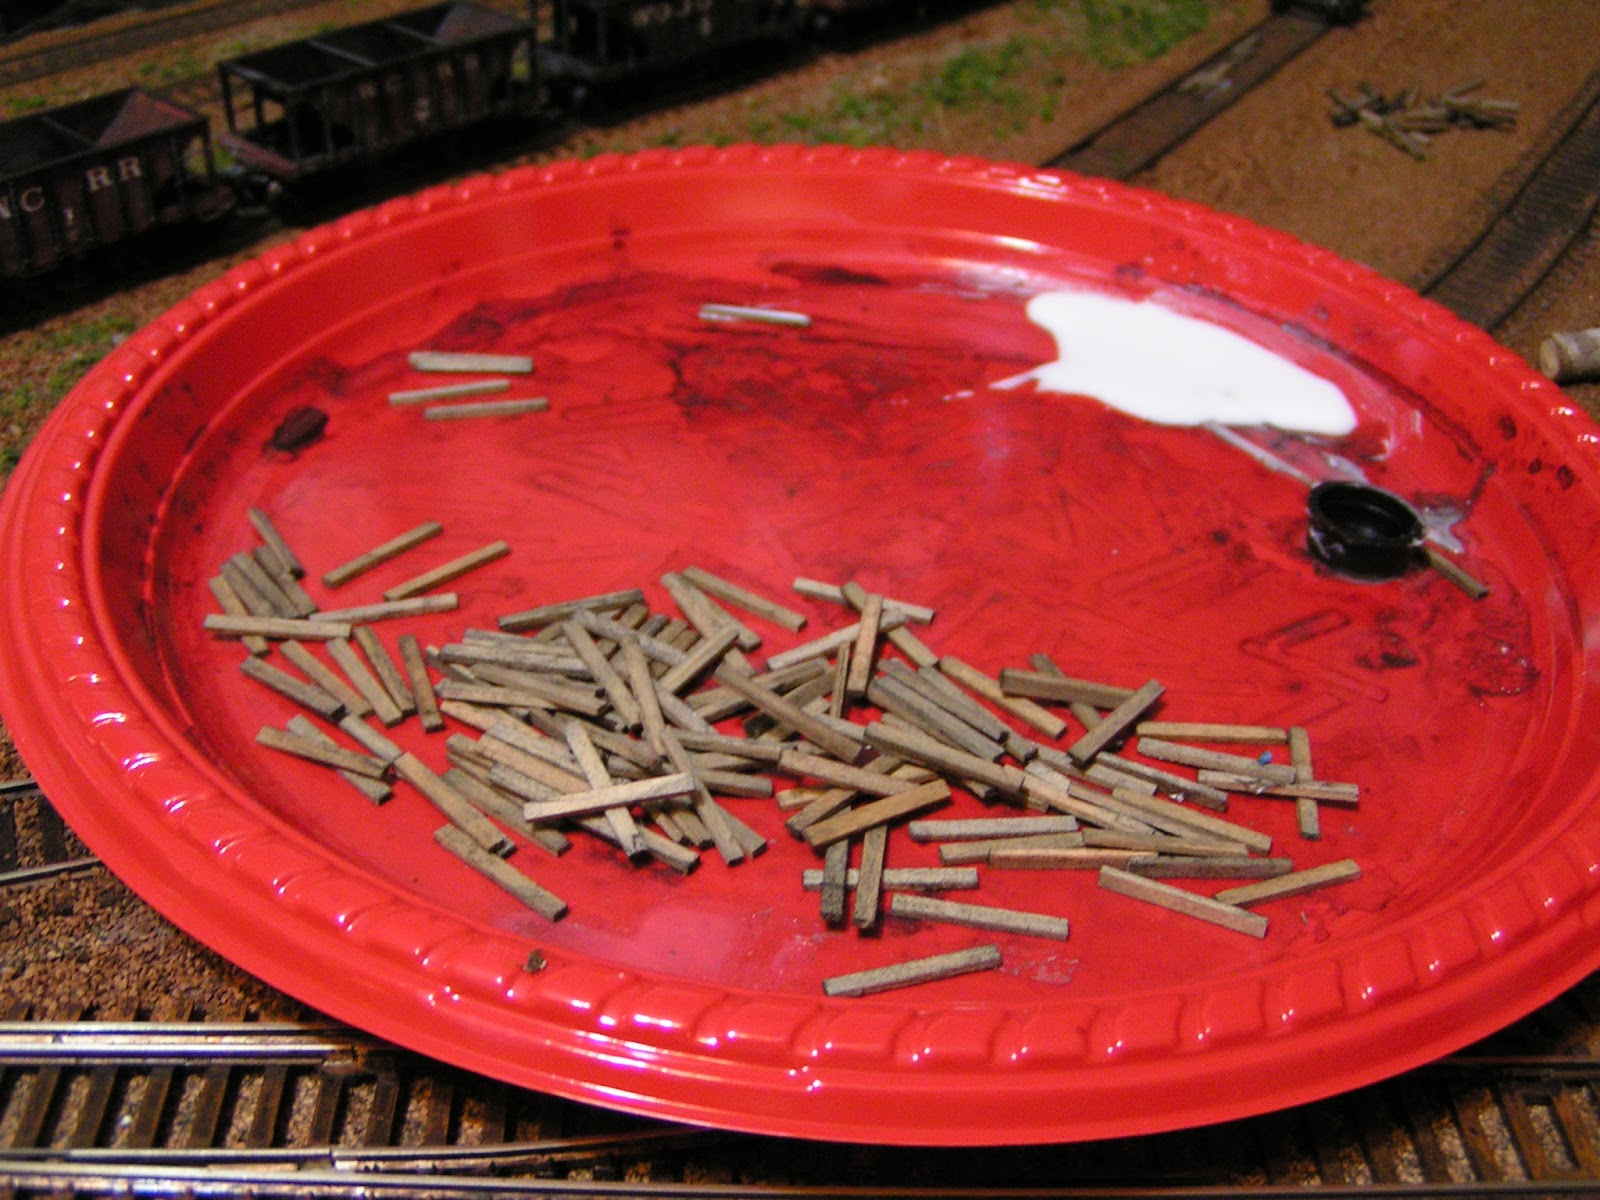
Here are two I made in the corner scene. These are Campbell Scale Model narrow gauge wood ties. My local LHS has several dusty bags of them, I asked, and he gave me a deal. I figured I would use them to model scrap lumber laying here and there, some crossings etc.

The chosen area for my crossings, there are two tracks paralleling each other so there will be two crossing built.

Next I grabbed a handful of them, put them on a disposable plate, and soaked them in alcohol/india ink wash, then I let dry overnight. Here are my ties the next day.
Now I add some white glue to my plate (full strength)
I have big fat fingers, (notice all of my typos?) so a trick I use is to use an Exacto knife to stab and manipulate the wood ties.

Stab a tie and dab in the white glue.....

And start laying them down, be sure to keep a truck handy for testing, you do not want any interference.
(Sorry for the blurry picture)

Take your time and lay them down. It's these simple one evening projects I really enjoy. It makes a dramatic change in the layout, it's fun to do and keeps my interest high. I am in no hurry to build this layout, I take my time and enjoy what I do instead of rushing it. I confess there are time when I don't do anything for quite a long time, but again, to me it's the journey.

The center planking is complete, now time to start on the outside.

Two crossings completed (the other is out of frame to the left.
These will dry overnight. The next step will be to add dirt to make to road, I will bring it up to the level of the planks. As you can see, most of my layout is covered in WS fine brown ballast. I glued this down everywhere to cover up the plywood. I will come back and add different ground cover, dirt and grasses over most of it, not entirely covering it up but using it as a base for color and texture.
That's all for now, thanks for reading and check back for an update to this page.
UPDATE 06/07/2011

The planks are now good and dry, I went ahead and added the dirt road.

Crossing 1

Crossing 2

The roads runs from the corner area of the first two crossings (top picture) along a shelf beside the ROW, and crosses at the sawmill. It then proceeds under the girder bridge and disappears around a corner.
The dirt I use is distributed by Scenic Express, and is from "Smith & Sons Ballast, Medium Natural Soil and Dirt Blend" It is located at this link. It's real dirt and rock, some of you can probably go dig it in the back yard. I'm in Louisiana, so the color and texture I want is not available to me here. The dirt is fixed using the usual method of alcohol (or wet water) and 50/50 white glue water. I prefer alcohol, it seems to penetrate and soak much quicker and more thorough than wet water, plus it evaporates quickly.
Okay, when I first laid my track,(4 years ago) I "thought" I was doing as good a job as possible. I chose Atlas Code 83 because of the price, availability and good reviews on many different forums. I had 2 layouts 40 years ago so admittedly my track laying "skills" (if I ever had any) were rusty at best. But it seemed easy enough, watch my transitions, keep the joints smooth and most importantly, take my time. Once the track was down and the glue had dried, I started testing the track letting a 6 car train, running in reverse, loco pushing, make endless laps through my turnouts, around my corners, over the bridge, through the tunnels. I had a few places that needed adjustment, and one Atlas turnout was giving me a problem. It was in scale according to my NMRA gauge.....what a minute, whats this? One the the point rails had come loose from the sliding bar, it was floating on top of the bar and not being held tight against the rails. I'm told this is unusual ,but it happened to me. I put the rail on the bar were it was suppose to go and applied some ACC and let it dry. No more issues here, it's been fine for years. Everything ran nice on the layout without derailments, even my Bachmann 4-6-0, which have a reputation of having a front pilot truck that can be finicky on less than stellar trackwork. I felt comfortable enough to ballast the track. Now about a year ago, I started having a problem with derailments on the Atlas Wye at the beginning of the yard.

I decided to go with Peco code 83 turnouts (North American style) They have nothing but great reviews, are very durable, and a quality product. I also like the spring loaded points that hold the rail tight against the stock rails. The WYE and the two center turnouts will be changed to Peco. The Atlas on the far right will be changed with another Atlas, it hasn't given me a problem but it was damaged while I was pulling out the other turnouts (oops) .
I used a small putty knife to scrap the ballast, it came up so easily I didn't have to wet it. Apparently I didn't allow my wet water to soak completely or I didn't add enough glue/water mix, or my glue/water mix was wrong. I'll insure I do this correctly when I re-ballast.


The Pecos have a different geometry than Atlas, but it's workable, I just arraigned the turnouts until I had a straight run through too the existing rails. I had to add several short pieces of rail to make it all work. (see above picture by the blue pushpin) Once I had all the pieces in place I carefully tested everything with my most finicky cars. With everything just floating on the cork they went through the new Pecos smooth as butter. Once I was satisfied I soldered everything together, excepts the ends, I wanted to remove the ladder as an assembly so I could file and polish my solder joints. Once it was all smooth I reinstalled the assembly and soldered the 3 ends. I'll leave it here for now until I can get more pictures. See you soon.
UPDATE - More pictures of the installed assembly below, still testing by running trains through the ladder. No derails as of yet.


Testing is still progressing, so far so good. I decided it's now time to install the electric switch machines.


I ended up going with the Peco PL-11 above table switch machines, I was looking at under table tortoise machines, but on all three of these locations I ran into a 1 x 4 stringer in every location I drilled, so you you know what, I have used the Atlas above table machines everywhere else, and previously here, so what the heck. They do not bother me and I will camouflage them so they are not so noticeable.
More updates to come....
UPDATES 11/26/2011
I apologize for not posting more often, but life's challenges have interfered with my modeling. My best friend and co-worker passed away suddenly in July, so I've had to step up and assume his responsibilities, and it hasn't been easy. I'm either too tired from long days or I have no interest, until recently. I have installed the Peco's as mentioned earlier, I have the switch machines in and operating as they should, painted and ballasted. Everything is operating like a dream with no derailments. Peco are absolutely the greatest quality and worth every penny. If I build another layout I will not compromise on the turnouts. I will upload some pictures (soon hopefully). My computer died so I am awaiting for my new one to deliver. I'm a gamer so off the shelf computers don't work for me. As far as the yard is concerned I still need to add more scenery and fine details, make a bridge abutments and so on, but is sure is nice to run a train through here with no worries.
I hope you had a great Thanksgiving, stay tuned for pictures!


Today I finally got around to shingling and weathering the mine and tipple. I used shingles from Bar Mills, was quite easy. The shingles come in a rectangular sheet in strips, all that's needed is to cut the strips out of the sheet and glue on to the roof. In my case I used white glue.

The mine and tipple before weathering, paint (tipple) and Bar Mills shingles.

Once these had dried I used Bragdon Powders to tone down the shiny plastic on the kit walls. I used "Dark Rust" on the mine walls, along with some Dust Bowl Brown and Soot powders.

Next I weathered the shingles themselves. I started out by adding black streaks (Soot) here and there on the roof, then I toned everything down by Dust Bowl Brown and Weathered Brown over the entire roof.

Today, October 6, 2018, I had to dismantle WP, the structures, trees etc were all packed and saved, the rest went into the dumpster. It gave me 10 good years of enjoyment, but I had no other choice as I was forced to move to another city, and at this time, it simply wasn't in the cards to take it with me.
With that said, once I have a new home, I will begin to plan the next layout, maybe even another scale, we shall see.
Thank you for your wonderful blog! I'm trying to figure out what to do with my 4 x 8 table. I can't decide between N gauge or HO, or what layout to try. You have shown me what can be done with an Atlas plan, and it is much appreciated! Your layout is wonderful.
ReplyDeleteCraig
ReplyDeleteThank you for your nice comments. If you have any questions don't hesitate to ask.
(Don't let the anti 4 x 8 crowd get to you, it takes imagination and maybe some modifications, but they can be made great)
Dean
I didn't realize you modeled after the Milwaukee Road. My layout also was modeled after the Milwaukee Road. It just happens to start 10 years after the SOO LINE acquired it. I remember growing up as a kid watching the Orange and Black Milwaukee Road GP's lumbering through Davenport and Bettendorf. You've got quite an impressive layout. What's your best running steam engine?
ReplyDeleteI've just spent a VERY enjoyable 20 minutes wandering around your site. Both the site and your modeling have given me a bunch of ideas. I particularly like what you did with the Atlas turntable -- I have one that I tried to install under a layer of 1" foam to make a recessed pit, but I can't seem to get the %$#@ thing to work right , so it just sits there and mocks me! Now I'm tempted to start over with a surface mount installation. Of course, your model of the the famous letter L gondola is truly inspirational -- we just gotta get one for the club layout ASAP (www.crmha.org); our Brevard And Rocky Flats (BARF!) branch line would provide the perfect setting for such a useful item. Anyway, your site is great -- it really does convey how much fun you're having at playing trains. Thanks!
ReplyDeleteBTW, and if you're interested, you can check out my own first attempt at a website at www.sandysacerr.com. My Acadian Coast Eastern is another fictitious but plausible (protolanced? freetyped?)short line - a "shoulda-been" 2-footer in Maine. My wife set me up with a Godaddy site for my birthday last month, and after endless fussin' and cussin', I finally got the courage late last week to start letting the world know it's there.
Hi Sandy
DeleteThank you for the nice comments, the turntable needs to be completed in the center with planking. I will check out your website as well. I like the Maine two footers!
Dean
The photo of the old milwaukee road tracks and the turnout to the blackfoot branch.....that is a beautiful area.....makes me want to go there......or go back in time to watch and witness the scene back in the day.
ReplyDeleteThanks for dropping by!
ReplyDeleteYes the area is great as has a lot to offer, just outside of MIssoula of I-90